.png)
Free HEIC to PNG Converter: Instantly Change Image Formats

Unlock Your Images: The Ultimate HEIC to PNG Guide
Ever snapped the perfect shot on your iPhone, only to be stumped by a mysterious ".heic" file?
You've found the solution. A HEIC to PNG converter is a simple tool or process that transforms Apple's modern, high-efficiency image format into the universally beloved and versatile PNG. This allows you to open, edit, and share your photos on virtually any device or platform without a hitch.
What Exactly is This HEIC File Anyway?
So, you're staring at a file with a .heic extension and wondering what kind of digital sorcery this is. Don't worry, you haven't stumbled into an alternate dimension of file formats. You've simply encountered the High-Efficiency Image File Format (HEIC). Think of it as the newer, smarter cousin of the JPEG format that we've all known for decades. It's a bit like comparing a brand-new electric car to a trusty old sedan; they both get you from point A to B, but one does it with a lot more modern technology under the hood. HEIC is designed to be a container for images and image sequences, utilizing a cutting-edge compression method to store your precious memories.
This format wasn't just pulled out of thin air. It was developed by the Moving Picture Experts Group (MPEG), the same folks who brought us standards for video and audio compression that power everything from Blu-ray discs to streaming services. They looked at the digital landscape, saw our ever-growing libraries of high-resolution photos, and thought, "There has to be a better way to store all this data without our devices bursting at the seams." The result was a format that could maintain stunning image quality, even better than a JPEG in many cases, but at roughly half the file size. This is a game-changer, especially in an era where our phones are our primary cameras and storage space is always at a premium. It’s the reason you can store thousands of photos on your iPhone without it constantly begging you to clear up space.
The Story Behind High-Efficiency Image Format
The journey of HEIC is intrinsically linked to the evolution of our digital lives. Back in the day, a 5-megapixel photo was considered huge. Now, our phone cameras pack more power than professional equipment from just a decade ago, capturing breathtaking detail, vibrant colors, and advanced features like "Live Photos" and depth information for portrait mode. All this extra data needs a place to live, and the aging JPEG format was starting to feel the strain. It’s like trying to fit a week's worth of groceries into a single paper bag – something's bound to get squished or left behind. The developers at MPEG saw this coming. They based HEIC on the High-Efficiency Video Coding (HEVC) standard, also known as H.265. This video compression technology is renowned for its ability to handle 4K and 8K video streams efficiently. They ingeniously adapted this video technology for still images.
The real magic of HEIC lies in its container-like nature. A single .heic file isn't just a flat image. It can hold multiple images (like photo bursts), animations (like Live Photos), depth maps (for that cool background blur), and even audio. This flexibility is what makes it so powerful for modern devices. It’s not just storing a picture; it’s storing an entire photographic moment. When you take a Live Photo, the HEIC file bundles the main image along with the short video clip, keeping them perfectly synchronized. This multi-layered approach was a monumental leap forward, creating a format built for the future of computational photography. It’s a sophisticated package designed to encapsulate the richness of modern imaging, a far cry from the simple, one-layer world of JPEGs.
Why Apple Made the Switch to HEIC
Apple’s decision to adopt HEIC as the default image format starting with iOS 11 in 2017 was a classic Apple move: a bold, forward-thinking change that, while initially causing a few headaches, was ultimately aimed at improving the user experience. Let's face it, Apple loves to be at the forefront of technology, and they saw the immense potential in HEIC. The primary driver was, without a doubt, the incredible space-saving advantage. As iPhone cameras got progressively better, capturing 12-megapixel photos, 4K video, and Live Photos, the storage on users' devices was filling up faster than ever. Every gigabyte became precious real estate. By switching to HEIC, Apple could essentially allow users to store twice as many photos in the same amount of space without sacrificing a single pixel of quality. It was a win-win for both the user and for Apple, as it reduced the strain on iCloud storage as well.
But it wasn't just about saving space. HEIC offered superior features that aligned perfectly with Apple's vision for photography. The format supports 16-bit color depth, a significant step up from JPEG's 8-bit. What does that mean for you? Smoother gradients, a wider range of colors, and less of that ugly "banding" effect you sometimes see in photos of sunsets or clear blue skies. It allows for more subtle and accurate color representation, bringing photos closer to what the human eye actually sees. Furthermore, the ability to store non-destructive edits was a huge plus. You could crop, rotate, or apply filters to a photo, and the HEIC file could save those changes as instructions rather than permanently altering the original pixels. This meant you could always revert to your original shot, a level of flexibility that photographers crave. By embracing HEIC, Apple wasn't just choosing a new file type; it was future-proofing its entire photo ecosystem.
PNG: The Unsung Hero of Image Formats
While HEIC is the new kid on the block with all its fancy compression tricks, let's not forget about the venerable and incredibly useful PNG. The Portable Network Graphics format, or PNG, is like the reliable, trustworthy multi-tool in your digital workshop. It might not be the default for your camera, but for a huge range of applications, it's not just a good choice—it's the only choice. Developed in the mid-1990s as a superior, patent-free replacement for the older GIF format, PNG quickly became the go-to standard for web graphics, logos, icons, and any image where clarity and background flexibility are paramount. It was born out of a need for a more powerful and open format for the burgeoning World Wide Web, and it has served that purpose flawlessly for decades.
The real beauty of PNG lies in what it does, and what it doesn't do. What it does is handle transparency with unmatched elegance. What it doesn't do is throw away your precious image data. This combination of features makes it an indispensable asset for graphic designers, web developers, and anyone who needs to layer images or maintain absolute fidelity. When you see a company logo floating perfectly on a website's colored background, or a detailed diagram with crisp lines and text, you're almost certainly looking at a PNG. It's the format that prioritizes quality and versatility over the raw file size efficiency of formats like JPEG or HEIC. It’s the unsung hero that works tirelessly behind the scenes to make the digital world look clean, professional, and sharp.
Transparency is King: Why Designers Love PNG
If you've ever tried to place a logo with a clunky white box around it onto a colored background, you understand the immediate and profound value of transparency. This is where the PNG format reigns supreme. Unlike JPEG, which doesn't support transparency at all, PNGs have what's called an "alpha channel." This is an extra layer of data that tells each pixel how transparent it should be, on a scale from completely opaque to fully transparent. This isn't just a simple on/off switch; it allows for varying levels of semi-transparency, creating smooth, feathered edges and realistic translucent effects, like glass or smoke. This capability is nothing short of revolutionary for graphic and web design. It’s the magic that allows for clean, seamless layering of visual elements.
Imagine designing a website. You need to place your company's intricate logo over a dynamic background image. With a JPEG, you'd be stuck with a solid block of color around the logo, which looks amateurish and jarring. With a PNG, the logo appears to float effortlessly, integrating perfectly with the design no matter what is behind it. This applies to everything from icons and buttons to complex illustrations and user interface elements. It liberates designers from the tyranny of the rectangle, allowing shapes to be whatever they need to be. This is why when you download icons, logos, or user interface kits from stock sites, they are almost always provided in PNG format. The alpha channel transparency is non-negotiable for professional-grade design work, making PNG the undisputed king in any context where an image needs to blend flawlessly with its surroundings.
Lossless Compression: Keeping Your Images Crisp
Let's talk about compression. When you save an image, algorithms work to make the file size smaller. There are two main types: lossy and lossless. "Lossy" compression, used by formats like JPEG and HEIC, achieves smaller file sizes by permanently discarding some of the image data. The algorithm makes an educated guess about which details your eyes are least likely to miss and throws them away. For photographs, this is usually a fantastic trade-off. However, for images with sharp lines, text, or flat areas of color—like logos, charts, or screenshots—lossy compression can be a disaster. It introduces fuzzy artifacts, blurs sharp edges, and makes text difficult to read. This is where "lossless" compression comes in, and it's the secret sauce of the PNG format.
Lossless compression is like a perfectly organized digital packer. It finds more efficient ways to store the pixel data without throwing a single bit of information away. It looks for patterns and creates a shorthand to describe them. For example, if there's a row of 200 blue pixels, instead of saying "blue pixel, blue pixel, blue pixel..." 200 times, it simply says "200 blue pixels." When you open the image, the file is "unpacked" perfectly, restoring every single pixel to its original state. This means that an image saved as a PNG will be identical to the original, every single time you open and save it. For this reason, PNG is the ideal format for archiving master copies of digital art, for taking screenshots where text needs to be perfectly legible, and for any graphic where maintaining the integrity of sharp lines and solid colors is crucial. It guarantees that what you save is exactly what you'll see later, with no degradation or fuzzy surprises.
Your Quick Guide to HEIC to PNG Conversion
Alright, let's get down to brass tacks. You have a HEIC file, and you need it to be a PNG. The good news is that you're spoiled for choice. Gone are the days of needing obscure, expensive software to handle a simple file conversion. Today, the process can be as simple as a drag-and-drop on a website or a few clicks within your computer's operating system. The "best" method really depends on your situation: Are you converting a single photo on a computer you don't own? An online tool is your best friend. Are you at home on your Mac, needing to convert a whole folder of vacation photos? Your computer already has everything you need.
Think of it like needing to open a bottle. You could use a dedicated bottle opener (specialized software), the edge of a countertop (a clever built-in trick), or ask a friend to help (an online service). They all get the job done, but one might be more convenient or appropriate for the moment. We're going to walk through the most common and effective methods, starting with the easiest and moving on to the built-in tools you might not even know you have. By the end of this section, you'll be able to look a HEIC file in the eye and convert it to a beautiful, universally compatible PNG without breaking a sweat. It's time to take control of your images and make them work for you, wherever you need them.
Using the Best Free Online HEIC to PNG Converter
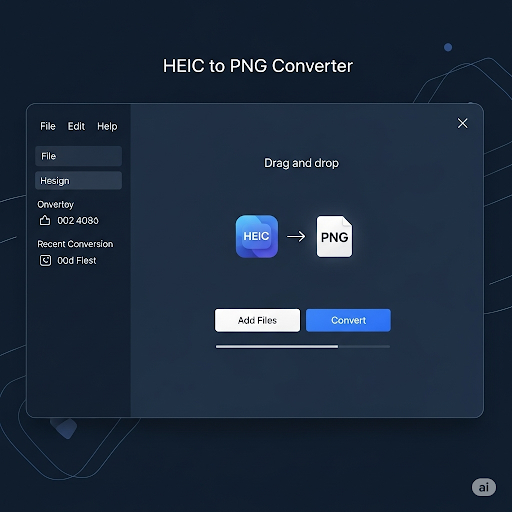
When speed and convenience are your top priorities, nothing beats a good online converter. For those moments when you just need to convert one or two files quickly without installing any software, a web-based tool is the perfect solution. This is especially true if you're on a public computer, a work computer with software installation restrictions, or simply don't want to clutter your own device with another program. The process is elegantly simple: you visit a website, upload your HEIC file, and download the converted PNG file moments later. It’s the epitome of a quick fix for a common problem.
One of the most reliable and user-friendly options available is the HEIC to PNG converter from SEO Magnate. This tool is designed with simplicity in mind. There are no complicated menus or confusing options to navigate. You are typically greeted with a large, clear upload box. You can either drag and drop your .heic file directly onto the webpage or click a button to browse your computer's files and select it. Once uploaded, the conversion process starts automatically in the background. The server does all the heavy lifting, transforming the file format while preserving the image quality. Within seconds, a download link for your shiny new .png file appears. It’s a completely hassle-free experience, making it ideal for users of all technical skill levels. You don’t need to understand the underlying technology; you just need your file to work, and this tool delivers on that promise.
Converting on Your Mac: The Built-in Magic
If you're a Mac user, you're in luck. Apple, being the creator of the HEIC conundrum in the first place, has baked powerful and easy-to-use conversion tools directly into macOS. You don't need to download a single thing. The most straightforward method involves an application you probably use every day: Preview. This unassuming app is far more powerful than its name suggests. To convert a HEIC file, simply double-click it to open it in Preview. If for some reason it opens in another app, just right-click the file, go to "Open With," and select "Preview."
Once your image is open, the rest is a walk in the park. Go to the "File" menu at the top of your screen and select "Export." A dialog box will pop up, giving you several options. This is where the magic happens. Click on the "Format" dropdown menu, which will likely default to HEIC or JPEG. Scroll through the list and select "PNG." That's it! You can also adjust the file name and choose where you want to save the newly converted file. Before you click "Save," you'll notice a slider for "Quality" is not present for PNG, because it is a lossless format. This is a key difference from exporting as a JPEG, where you have to decide on a quality level. With PNG, you are guaranteed a perfect, pixel-for-pixel copy of your image data. This built-in Preview method is fantastic for single images or small batches and gives you direct control over the output without ever leaving the familiar Mac environment.
Windows Warriors: Taming HEIC Files Natively
For a long time, Windows users felt a bit left out in the cold when it came to HEIC files. Double-clicking one would often result in a frustrating "Hmm, we can't open this file" message. Thankfully, those days are over. Microsoft has integrated support for the format directly into Windows 10 and 11, though it might require a small, one-time setup from the Microsoft Store. It's a simple, free (or very cheap) extension that unlocks native HEIC capabilities within the operating system. To get it, open a HEIC file, and if Windows can't read it, it will usually prompt you with a link to the Microsoft Store to get the necessary "HEIF Image Extensions." There is also a companion "HEVC Video Extensions" that may be required, which sometimes costs a nominal fee (around $0.99), but it's a small price to pay for seamless integration.
Once these extensions are installed, the experience is transformed. Your HEIC files will now show thumbnails in File Explorer, just like any other image. More importantly, you can open them directly in the built-in Photos app. And just like with the Mac's Preview app, the Windows Photos app can act as a simple and effective converter. Open your HEIC image in Photos. In the top right corner, you'll see an ellipsis button (...) for "See more." Click it, and then select "Save as." A save dialog box will appear. Under the "Save as type" dropdown menu, simply choose "PNG" and click "Save." This native approach is wonderfully efficient. It turns a once-incompatible file format into just another image that Windows handles with ease, allowing you to view, edit, and convert without needing to search for third-party solutions.
Beyond the Basics: Advanced Conversion Techniques
Once you've mastered the simple, one-off conversions, you might find yourself needing a bit more power and efficiency. Perhaps you've returned from a vacation with hundreds of HEIC photos, and the thought of converting them one by one is enough to make you want to leave them on your phone forever. Or maybe you're a professional who needs to integrate file conversions into a more complex workflow, demanding specific settings and high-volume processing. This is where we move beyond the simple drag-and-drop tools and built-in options and explore the world of advanced conversion techniques.
These methods are all about scaling up. They're designed to save you your most valuable asset: time. Whether it's through batch processing that converts an entire folder with a single click, using dedicated software that offers granular control over every aspect of the output, or leveraging the powerhouse capabilities of professional photo editing suites like Adobe Photoshop, these techniques are for when the basics just won't cut it. They might have a slightly steeper learning curve, but the payoff in productivity is immense. Let's dive into the toolsets that will turn you from a casual converter into a file format wizard, capable of handling any volume of images with speed and precision.
Batch Conversion: Saving Hours of Your Time
Batch conversion is the art of converting multiple files simultaneously, and it's an absolute game-changer for anyone dealing with more than a handful of images. The tedious process of open, export, save, repeat is replaced by a single, elegant operation. Imagine dumping an entire folder of 500 HEIC photos into a queue, pressing a "Convert" button, and walking away to grab a coffee while the computer does all the work. That's the power of batch processing. It's the difference between washing your clothes by hand, one sock at a time, and using a modern washing machine. Both will get your clothes clean, but one is infinitely more efficient and less soul-crushing.
So, how do you do it? On a Mac, the built-in Automator app is your secret weapon. You can create a simple "workflow" that takes a selection of image files, applies a "Change Type of Images" action (setting the type to PNG), and saves the new files to a specified folder. Once you save this workflow as a Quick Action, you can select a hundred HEIC files in Finder, right-click, and run your conversion workflow directly from the context menu. For Windows users and those looking for a more visual interface, dedicated converter software is often the best bet. Programs like IrfanView (with plugins), XnConvert, or Adapter are often free and provide powerful batch conversion interfaces. You simply add your folder of HEIC files, set your output format to PNG, choose a destination, and let it run. Investing a few minutes to learn how to batch convert can save you hours of monotonous clicking down the road.
Choosing Dedicated Converter Software: Pros and Cons
While online tools are convenient and built-in methods are free, dedicated, installable converter software occupies a powerful middle ground. These are programs whose entire reason for being is to convert files from one format to another, and as such, they often come packed with features that go far beyond a simple format swap. Think of programs like iMazing HEIC Converter, CopyTrans HEIC for Windows, or the aforementioned XnConvert. The biggest "pro" of this approach is control. These applications often give you granular options for your conversions. You might be able to resize images during conversion, adjust compression settings (though not for lossless PNG), strip or preserve metadata, rename files based on a set pattern, and even apply basic watermarks or color corrections, all within the same batch process. They are the Swiss Army knives of file conversion.
However, there are a few "cons" to consider. First, you have to install software on your computer, which takes up disk space and can be a non-starter on work or public machines. Second, while many great options are free, some of the most powerful and feature-rich programs come with a price tag. You need to weigh whether the advanced features are worth the cost for your specific needs. Finally, there's the risk of downloading software from untrustworthy sources. It's crucial to stick to reputable developers and download from their official websites to avoid inadvertently installing malware or adware along with your converter. For users who frequently convert large batches of files and need a consistent, powerful, and feature-rich workflow, the pros of dedicated software often far outweigh the cons.
Using Photo Editing Giants: Photoshop and GIMP
If you already work with images professionally or as a serious hobbyist, chances are you have a powerful photo editing suite like Adobe Photoshop or its excellent free and open-source alternative, GIMP (GNU Image Manipulation Program), installed on your machine. These programs are the titans of the image editing world, and as you might expect, they can handle HEIC to PNG conversions with ease, often as part of a larger editing workflow. The primary advantage of using these programs is integration. You're not just converting a file; you're opening it in an environment where you can perform any number of adjustments—cropping, color correction, retouching—before exporting it in the format you need. It streamlines the entire process from raw image to finished product.
In Photoshop, modern versions can open HEIC files natively (you may need the HEIF/HEVC extensions from the Microsoft Store on Windows). Once the file is open, you can simply go to File > Save As or the more modern File > Export > Export As... and choose PNG from the format list. The "Export As" dialog gives you excellent control over transparency and other options. GIMP offers a similar experience. With the right plugins installed (many modern versions include this by default), you can open a HEIC file and then export it via File > Export As..., where you can type in your desired filename with a .png extension or select "PNG image" from the extensive file type list. While using Photoshop just for a simple conversion is like using a sledgehammer to crack a nut, if you're already in the application for editing, it's by far the most efficient method. It keeps your entire creative process under one roof.
Not All Converters Are Created Equal
In the vast digital marketplace of tools and software, it’s a tempting but dangerous assumption to think that one heic to png converter is just as good as the next. The reality is far more nuanced. The method or tool you choose can have a significant impact on the final output, your personal privacy, and the integrity of your image's hidden data. It's like choosing a restaurant: you can get a burger from a fast-food joint or a gourmet bistro. Both are burgers, but the quality of ingredients, the preparation method, and the overall experience are worlds apart. Similarly, converters range from quick and dirty to meticulously precise.
Some online tools might aggressively compress images to save on their own server bandwidth, resulting in a PNG that, while in the right format, has lost some of its original crispness. Others might fail to properly interpret the advanced features of a HEIC file, like its wide color gamut, leading to a dull or discolored PNG. And then there's the critical issue of security and privacy, especially when you're uploading personal photos to a stranger's server on the internet. Understanding these differences is key to making an informed choice—one that ensures your images not only get converted but are also treated with the care they deserve, preserving their quality and protecting your data.
Preserving Image Quality: Don't Lose a Pixel
This is the big one, the concern that tops everyone's list: "Will converting my photo make it look worse?" The answer, thankfully, can be a resounding "No," as long as you use the right process. The key here is understanding the difference between the source (HEIC) and the destination (PNG). HEIC uses lossy compression, while PNG uses lossless compression. This is fantastic news for quality preservation. When you convert from a lossy format to a lossless one, you aren't introducing any new compression artifacts. The converter simply takes the pixel data as it exists in the HEIC file—after its initial lossy compression—and saves it perfectly within the lossless PNG container. Think of it like taking a printed photograph (the HEIC) and putting it in a perfect, high-quality frame (the PNG). The frame doesn't change the photo itself; it just preserves it exactly as it is.
The danger of quality loss primarily comes from two sources. First, a poorly designed converter might unnecessarily process or re-compress the image data before saving it as a PNG, which can introduce degradation. This is why sticking to reputable tools is so important. A good converter's goal is to perform a clean, direct translation of data. The second, and more common, way to lose quality is by converting in the wrong direction: from HEIC to PNG, and then later converting that PNG to a lossy format like JPEG. Every time you save to a lossy format, you lose a little more data. The golden rule for preserving quality is to go from your source HEIC directly to the final format you need. By converting straight to PNG, you are effectively freezing the image quality at the level of the original HEIC file, ensuring no further degradation occurs.
The Privacy Puzzle: Are Online Converters Safe?
Uploading your files to the internet always requires a degree of trust. When you use an online HEIC to PNG converter, you are sending a copy of your photograph to a third-party server. That server processes the file and then sends the converted version back to you. This raises a legitimate and important question: what happens to your photo on that server? Are the operators of the website looking at your pictures? Are they storing them? Are they selling them to data brokers? These are valid concerns, especially if the photos are of a personal or sensitive nature—pictures of your family, legal documents you've photographed, or proprietary business images. The truth is, the level of safety varies dramatically from one service to another.
Reputable online converters take your privacy seriously. Their business model is based on trust, and they know that a data scandal would be ruinous. Look for services that have a clear and easy-to-find privacy policy. This policy should explicitly state that they do not view, share, or store your files for any longer than is necessary to perform the conversion (often a few hours at most, to allow you time to download). Many high-quality services, including the HEIC to PNG converter we recommend, use automated processes, meaning no human ever interacts with your files, and they are automatically deleted from the servers shortly after conversion. As a general rule of thumb, for everyday, non-sensitive photos like a picture of your cat or a landscape, a trusted online converter is perfectly safe and wonderfully convenient. For highly sensitive or confidential images, it's always wisest to use an offline method, such as the built-in tools on your Mac or Windows PC, to ensure your files never leave your device.
Metadata Matters: What Happens to Your EXIF Data?
Tucked inside almost every digital photo you take is a treasure trove of hidden information called metadata, most commonly in a format known as EXIF (Exchangeable Image File Format). This isn't part of the visual image itself, but rather data about the image. It includes things like the date and time the photo was taken, the camera model and manufacturer (e.g., Apple iPhone 14 Pro), the specific camera settings used (shutter speed, aperture, ISO), and, if you have location services enabled, the precise GPS coordinates of where you were standing when you pressed the shutter. This data is incredibly useful for organizing your photos, remembering details about a trip, or for photographers who want to analyze their settings. The question is, what happens to this valuable data during the conversion from HEIC to PNG?
The answer, once again, is: it depends on the converter. A good, well-designed converter will recognize the importance of this metadata and will carry it over from the original HEIC file to the new PNG file. The PNG format is fully capable of storing this EXIF data. However, some simpler or poorly programmed converters might strip this information out during the process, either to simplify the conversion or to reduce the final file size by a minuscule amount. Online converters can be a mixed bag in this regard. Some will preserve metadata by default, others might have a checkbox option to "Keep EXIF data," and some will discard it without asking. If preserving this information is important to you—for example, if you're a photographer who relies on it to catalog your work—it's crucial to either test your chosen converter with a sample file or choose a method that you know preserves it, such as the native Mac Preview or Photoshop export functions, which typically offer explicit control over metadata handling.
Putting Your PNGs to Work: Real-World Scenarios
So you've successfully mastered the conversion. You've turned that perplexing HEIC file into a versatile and beautiful PNG. Now what? The real value of this conversion isn't just in changing a file extension; it's about unlocking the potential of your image and putting it to use in a multitude of practical, real-world scenarios where HEIC would have been a roadblock. This is where the rubber meets the road, where your newly converted image leaves the confines of your photo library and enters the wider digital world.
The PNG format, with its unique strengths of lossless quality and alpha channel transparency, is not just a "compatible" format; it's often the preferred format for a huge range of applications. From building a sleek, professional website to compiling a digital portfolio that showcases your work in the best possible light, or simply sharing a family photo without your recipient having to ask, "How do I open this?"—PNG is your key. Let's explore some of the specific situations where your converted PNG file will not just work, but shine, demonstrating why taking that extra step to convert was absolutely worth the effort.
Web Designers: Optimizing Images for Websites
For a web designer or developer, image formats are not an afterthought; they are a fundamental component of site performance, aesthetics, and user experience. In this arena, PNG is an absolute workhorse. Its primary superpower, transparency, is non-negotiable for modern web design. Imagine you're building a website for a client. Their logo is a complex shape, not a simple square. You need to place this logo over various backgrounds—a solid color header, a photographic banner, a patterned footer. If you use a JPEG, you're stuck with that ugly, unprofessional white box around the logo. But as a PNG with a transparent background, the logo integrates seamlessly and elegantly into any part of the design. This extends to icons, call-to-action buttons, and any graphical element that isn't a full-bleed rectangle.
Furthermore, the lossless nature of PNG is critical for maintaining visual brand identity. A logo must be crisp and its colors exact. The compression artifacts from a JPEG can make text look fuzzy and can shift brand colors slightly, which is a cardinal sin in branding. By converting a graphic element from a source file to PNG, you guarantee that every pixel remains exactly as intended. While it's true that PNG files can be larger than JPEGs, modern web development includes tools like image CDNs and compression algorithms (like optipng or pngquant) that can significantly reduce PNG file sizes without sacrificing quality, giving designers the best of both worlds: pristine quality and speedy load times. The journey from a HEIC screenshot of a design mockup to a website-ready PNG asset is a common and essential workflow for any web professional.
Photographers: Archiving and Sharing Your Portfolio
For photographers, image quality is everything. Your photos are your art and your business card. While you might shoot in RAW for maximum editing flexibility, your final, edited images need to be stored and shared in a format that preserves all your hard work. This is where converting to a high-quality format like PNG becomes a vital step in your archival and delivery process. Let's say you've taken a stunning portrait on your iPhone. The HEIC file captures a great deal of color and detail. After editing it on your desktop, you need to save a master copy. Saving it as a JPEG involves another round of lossy compression, potentially degrading the subtle tonal variations you spent so much time perfecting.
By converting and saving the final, edited masterwork as a PNG, you are creating a perfect, lossless archive copy. This file can be opened, viewed, and even re-edited in the future without any further quality degradation. It’s your digital negative. When it's time to share your portfolio with a potential client or submit to a gallery, sending a PNG (or a high-quality TIFF, another lossless format) demonstrates professionalism and respect for your own work. It ensures the viewer sees the image exactly as you intended, with no compression artifacts muddying the details or banding the smooth gradients in the sky. For web portfolios, PNGs are again ideal for displaying your work with maximum clarity, especially for images that have been composited or have sharp details that JPEGs might soften. The conversion from the initial HEIC capture to a final PNG archive is a cornerstone of a robust digital photography workflow.
Everyday Users: Sharing Memories Without Headaches
Let's step away from the professional world for a moment and talk about the most common use case of all: simply sharing photos with friends and family. This is where the HEIC format, despite its technical superiority, causes the most frequent friction. You snap a fantastic photo of a family reunion on your iPhone and text it to a group chat. The Android users and those with older PCs in the group reply with a chorus of "I can't open the file!" or "It's just a blank icon." It's a frustrating and surprisingly common communication breakdown, all because of an incompatible file format. This is the everyday problem that a quick HEIC to PNG conversion solves beautifully.
By taking a moment to convert your HEIC photo to PNG before sharing it, you are ensuring universal compatibility. PNG is supported by literally every modern operating system, web browser, social media platform, and email client on the planet. There is zero chance that your recipient won't be able to view it. It removes the technical barrier and lets people focus on what's important: the memory you're sharing. Whether you're emailing photos to your grandparents, posting a picture to a forum, uploading a profile picture, or creating a digital scrapbook, converting to PNG is a simple act of digital courtesy. It guarantees a smooth, hassle-free experience for everyone involved, making sure your beautifully captured moments can be easily seen and enjoyed by all, regardless of the device they're using.
External Resources:
For a deeper technical dive into the formats discussed, you can visit their Wikipedia pages:
High-Efficiency Image File Format (HEIC)
Portable Network Graphics (PNG)
Conclusion
Navigating the world of digital image formats can feel unnecessarily complex, but as we've seen, the journey from the efficient yet restrictive HEIC to the universally compatible and versatile PNG is not only possible but also remarkably straightforward. We've untangled the "why" behind Apple's shift to HEIC—its incredible space-saving prowess and advanced features—and celebrated the enduring strengths of PNG, namely its flawless transparency and pixel-perfect lossless quality. More importantly, we've armed you with a complete toolkit of solutions.
Whether you opt for the instantaneous convenience of a trusted online HEIC to PNG converter, the elegant simplicity of the built-in Preview and Photos apps on your Mac and Windows PC, or the sheer power of batch processing with dedicated software, there is a method perfectly suited to your needs. The key takeaway is that you are in full control of your images. You no longer need to be stumped by an incompatible file. By understanding the tools at your disposal and considering the crucial factors of quality, privacy, and metadata, you can confidently transform your photos, unlocking their potential for web design, professional portfolios, or simply sharing cherished memories without a single technical hiccup.
Frequently Asked Questions (FAQs)
1. What is the best HEIC to PNG converter? The "best" converter depends on your needs. For quick, easy, single-file conversions without any software installation, a reliable online tool like the one on SEO Magnate is excellent. For Mac users, the built-in Preview app is fantastic and free. For Windows users, installing the HEIF extensions and using the Photos app is the most integrated solution. For power users converting hundreds of files, dedicated batch conversion software like XnConvert is superior.
2. Does converting HEIC to PNG reduce quality? No, converting from HEIC to PNG does not inherently reduce image quality. HEIC uses lossy compression, while PNG uses lossless compression. The conversion process takes the existing pixel data from the HEIC file and saves it perfectly in the PNG format. No new artifacts are introduced, and no data is lost during the conversion itself. You are essentially "freezing" the quality of the original HEIC file.
3. Can I convert HEIC to PNG on my iPhone or Android phone? Yes. On an iPhone, you can use the "Files" app. Save the photo to Files, then you can often export or share it in a different format. There are also numerous third-party apps on the App Store that specialize in conversion. On Android, while it doesn't natively create HEIC files, it can often open them (on newer versions). For conversion, a variety of apps are available on the Google Play Store that can convert HEIC files to PNG or JPG.
4. Why can't I open a HEIC file on my computer? This usually happens on older versions of Windows or on systems that haven't installed the necessary codecs. By default, Windows does not know how to interpret the HEVC compression used by HEIC. The solution is to go to the Microsoft Store and download the "HEIF Image Extensions" and potentially the "HEVC Video Extensions." Once installed, Windows will be able to open HEIC files natively.
5. Is it safe to use online HEIC to PNG converters? It can be, provided you use a reputable service. A trustworthy online converter will have a clear privacy policy stating that your files are not viewed or stored long-term and are deleted from their servers after a short period. For everyday, non-sensitive photos, this is generally safe. For confidential or highly personal images, it is always safer to use an offline method like your computer's built-in tools to ensure the file never leaves your device.
6. What's the main difference between converting to PNG vs. JPG? The primary difference is compression and transparency. PNG uses lossless compression, meaning the quality is identical to the source, and it supports full transparency (alpha channel). This makes it ideal for graphics, logos, and images needing a clear background. JPG uses lossy compression, which results in a smaller file size but sacrifices some quality, and it does not support transparency. For general photographs where file size is a bigger concern than perfect pixel integrity, JPG is often a better choice. For graphics or master copies, PNG is superior.